
Create SSL Certificate using IIS - Microsoft Dynamics Navision 2016

Hi Readers,

In this blog we will see how we can create SSL certificate for Demo environment and attach it in Nav Administration to access NavUserPassword.

Creating SSL Certificate using IIS :-

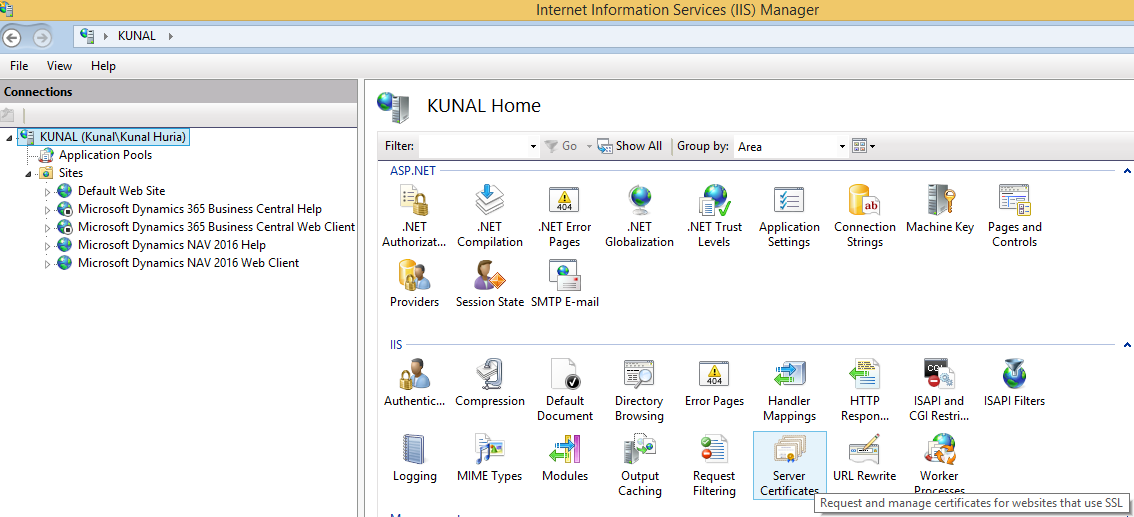
Step-1 Open Internet Information Services (IIS) Manager.

Step-2 Now select the server where you want to generate the certificate under Connections in left side menu and double click on Server Certificates under IIS tab as shown below:

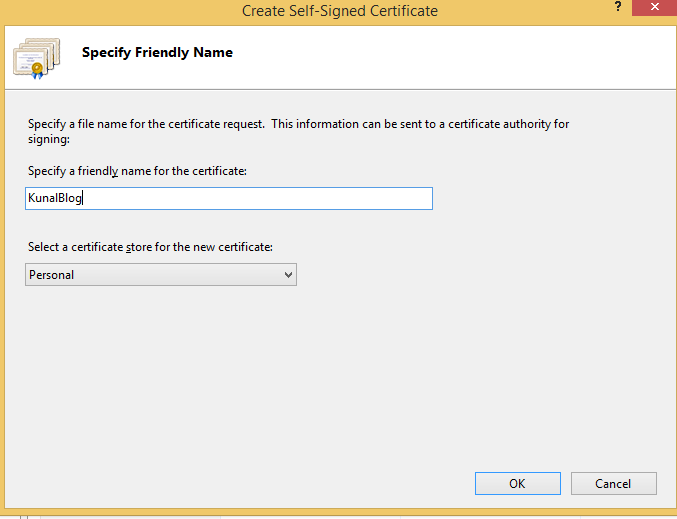
Step-3 Click on Self-Signed Certificate on Action menu shown right side of the window:

Step-4 Now Enter the friendly name for the certificate and click on ok button :

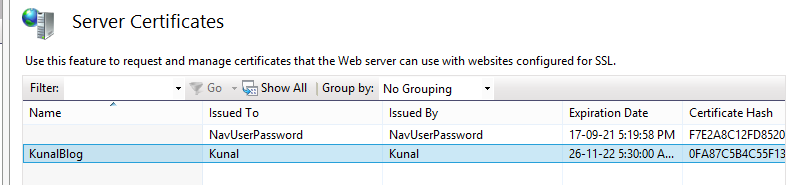
Step-5 SSL certificate is generated and you will see that in server certificates list.

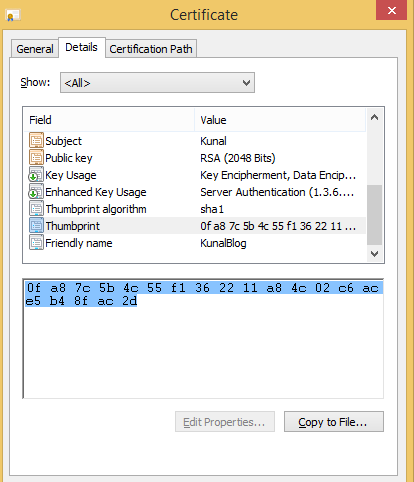
Step-6 Now double click on certificate we have generated (Ex-KunalBlog) and click on Details option to copy the Thumbprint of the certificate for further use.

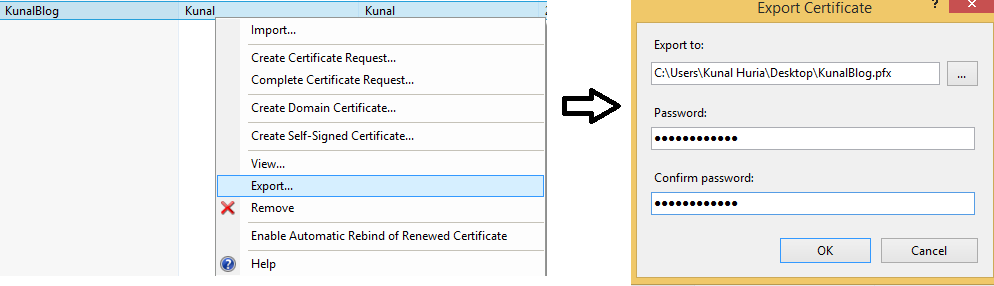
Step-7 You can also Export the certificate by just Right click on it and choose Export option, specify the path & Password as shown below:


Now see how to attach SSL Certificate thumbprint in Dynamics NAV 2016 Administration:-

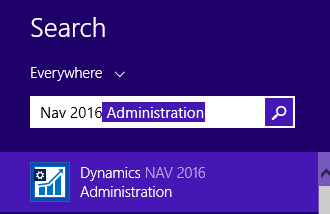
Step-1 Search Dynamics NAV 2016 Administration and Run it as Run as Administrator:

Step-2 Now Expand the server instance and in General tab paste that thumbprint value under Certificate Thumbprint property as shown below:

Note:- Restart the NAV Service and make sure credential type value should be NavUserPassword to access using Nav Users.

In next article will see how to add SSL Certificate to Trusted Root Certification Authorities:

https://kunalhuria.blogspot.com/2021/11/add-ssl-certificate-to-trusted-root.html


Happy to Help;)

Thanks for Reading!!!

Comments

  1. Impressive and powerful suggestion by the author of this blog are really helpful to me. Microsoft 365 Certified: Fundamentals

    ReplyDelete

Post a Comment

Popular posts from this blog

Amount In Words in Navision / Business Central

Hi Guys, In this article, we will see how to display amount in words in Microsoft Dynamics Business Central. Here, I am taking an example of Report object  which is widely used in Navision for converting decimal amount field into words. Procedure :-  Step-1 Declare the following Global Variables :         RepCheck:  Report  "Check";         NoText:  array [ 2 ]  of   Text ;         AmountInWords:  Text ; where, (1) RepCheck is a variable of  Report DataType Named as " Check " which is 1401. (2) NoText is a variable of DataType " Text " with array Dimension value as 2 which is defined as shown above. (3) AmountInWords is a variable of DataType " Text " which will store final result of amount in words. Step-2 Now, add the following code in OnAfterGetRecord() trigger of DataItem containing that decimal field value. So in my custom Purchase Order Report, i am adding code in the Purchase Header (DataItem) - OnAfterGetRecord() trigger.   trigger  OnA

Flow Custom field to G/L Entry and other Posted tables : From Purchase Order to Posted Purchase invoice

Hi Readers, In this blog we will see how we can transfer data from " Purchase Header" to "Purchase Invoice Header" & "G/L Entry" table in Business Central. In this example, will create "Remarks" field on Purchase Header table and after posting, flow it to Purchase Invoice Header & G/L Entry tables: Firsly, create required fields ("Remarks") in below mentioned tables by creating table extensions: Purchase Header (38) Purch. Inv. Header (122) Gen. Journal Line (81)  G/L Entry (17) For the Purch. Inv. Header table, you can just create copy the field from purchase header and paste it in  Purch. Inv. Header  table. If the field ID No. is same for that field for both the tables then you don't have to code i.e, it automatically transfer that field data from Purch. Header to Purch. Inv. Header . Step-(1)   tableextension   50104  "Purchase Header Ext"  extends  "Purchase Header" {      fields     {         

Calculate Date : Using Date Formula and CalcDate Function in Navision/BC

 Hi Everyone, In this article we will see how we can Calculate Date by adding and subtracting No. of Days / Months based on CalcDate and DateFormula datatype. Here, I define three variables required for: (1) " No of Days " -  To define No. of Days / Months as required. You can also use these units denoted as: <Unit> = D | WD | W | M | Q | Y (D=day, WD=weekday, W=week, M=month, Q=quarter, Y=year). (2) " From Date " and " To Date "  Date type Variables to store calculated date in it. page   50103  "Date from Date Formula" {     PageType = Card;     ApplicationArea = All;     UsageCategory = Administration;     SourceTable =  Integer ;      layout     {          area( Content )         {              group( General )             {                  field( "No. of Days"; "No. of Days" )                 {                     ApplicationArea = All;                 }             }         }     }      actions     {          area