
OTP Authentication in Microsoft Dynamics NAV using C/AL

 OTP is a "One-Time Password" which is randomly generated and sent to your registered mobile number or email address for validation of your transaction. In MS Dynamics NAV, OTP authentication can add an extra layer of security to our Environments. This is basically also known as two-factor authentications.

In this scenerio, we will see how we can use OTP functionality in NAV and i am using Nexmo here to implement it.


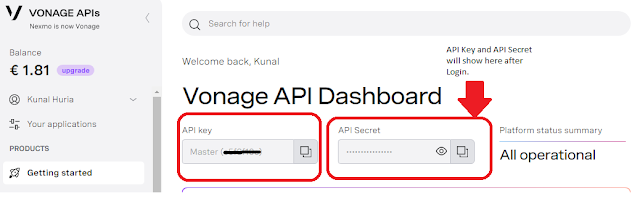
Step-1 Firstly, Create a new account on Nexmo or you may use any other SMS service provider to get the API and their Secret Key.Here i have created a free account for Testing Purpose using this Url -https://nexmo.com/ 

Once you have created an account, you will get your API credentials in the dashboard. Use the "API Settings" link to the right near the top of the screen to reveal the API key & its secret.


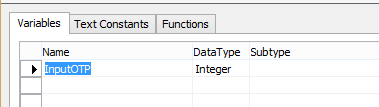
Step-2 Now, we need to create a new page and declare a global variable named "InputOTP" then set that variable as a field.


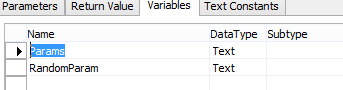
Global Variable of Page :-


We also need to create a global function (with Return Type - Integer) in page to flow the entered OTP to our Codeunit.


Step-3 Then, Create a new Codeunit in object Range and define the below described four functions with some local & global variables as shown below:      

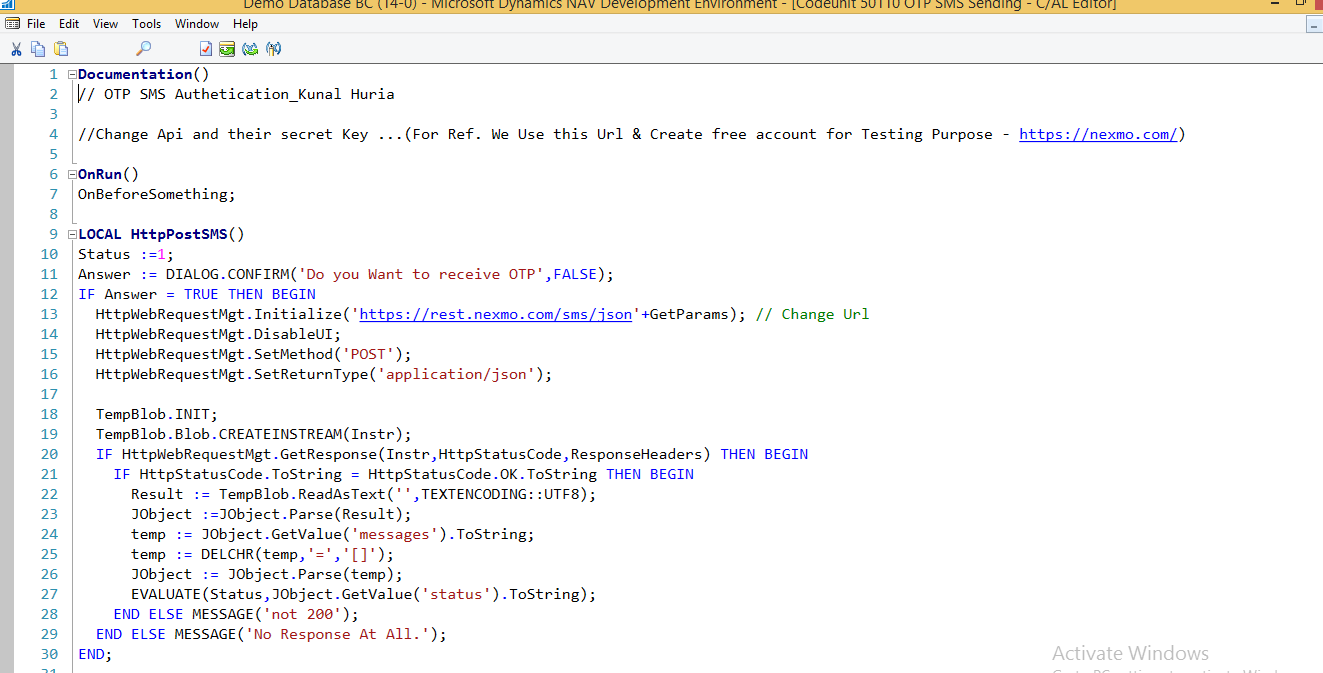
Local Variables of Function HttpPostSMS :-


Now, define other three functions as shown in screenshot:


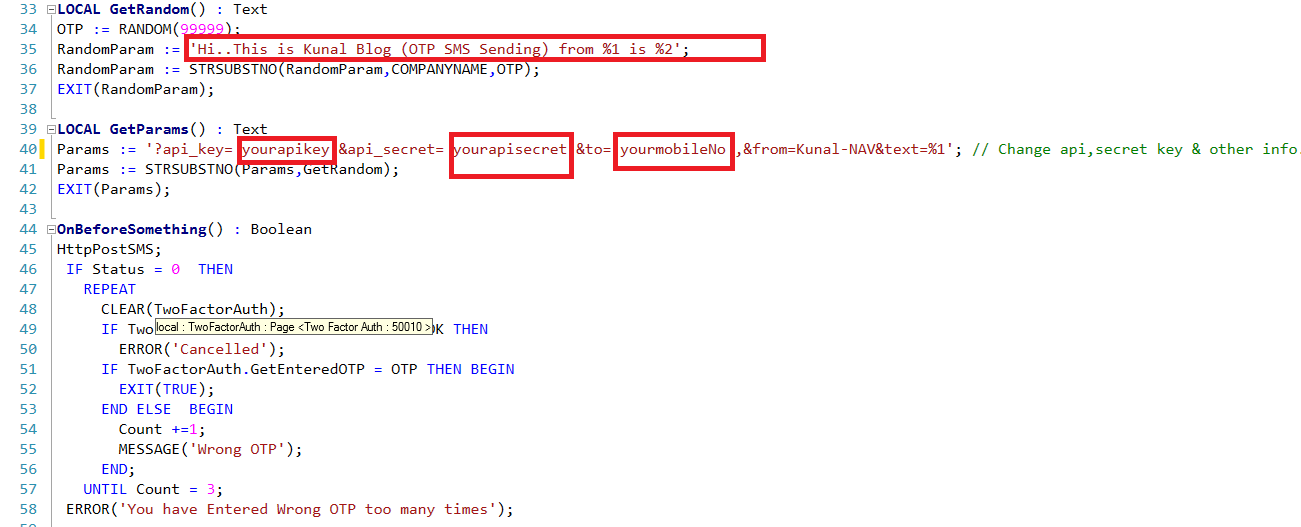
NOTE: (1) Change the message content as assign in RandomParam Variable.

(2) Change the API Key & their Secret as you shown in Nexmo Dashboard after you login with your account, created in step-1.

(3) Also define the Mobile No. with country code like (919876543210) on which you want OTP SMS.

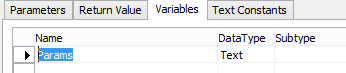
Local Variables of Function GetRandom :-


Local Variables of Function GetParams :-


Local Variables of Function OnBeforeSomething :-


Also, Global variables of Codeunit need to be defined as well :


Once everything is done, When a user tries to Run this codeunit s/he will get an OTP on their phone. They will see a dialog in NAV and must enter the OTP. They get three tries to do so.

Output :-  The output screen look like this:-


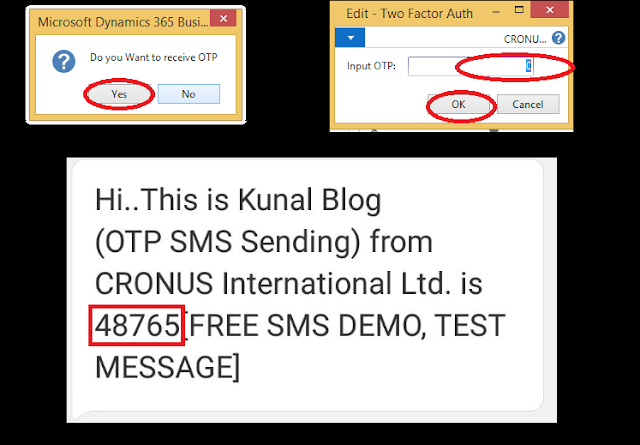
While clicking on OK button after entering OTP, nothing happens as we have not write anything in code.

Note :- Beside of using this function "OnBeforeSomething" we can also set Event subscriber here to use this functionality on after exact action where we want.


I hope this article is helpful for you NAV / Business Central Lovers.

Stay in touch for more content.😉


Comments

Popular posts from this blog

Amount In Words in Navision / Business Central

Hi Guys, In this article, we will see how to display amount in words in Microsoft Dynamics Business Central. Here, I am taking an example of Report object  which is widely used in Navision for converting decimal amount field into words. Procedure :-  Step-1 Declare the following Global Variables :         RepCheck:  Report  "Check";         NoText:  array [ 2 ]  of   Text ;         AmountInWords:  Text ; where, (1) RepCheck is a variable of  Report DataType Named as " Check " which is 1401. (2) NoText is a variable of DataType " Text " with array Dimension value as 2 which is defined as shown above. (3) AmountInWords is a variable of DataType " Text " which will store final result of amount in words. Step-2 Now, add the following code in OnAfterGetRecord() trigger of DataItem containing that decimal field value. So in my custom Purchase Order Report, i am adding code in the Purchase Header (DataItem) - OnAfterGetRecord() trigger.   trigger  OnA

Flow Custom field to G/L Entry and other Posted tables : From Purchase Order to Posted Purchase invoice

Hi Readers, In this blog we will see how we can transfer data from " Purchase Header" to "Purchase Invoice Header" & "G/L Entry" table in Business Central. In this example, will create "Remarks" field on Purchase Header table and after posting, flow it to Purchase Invoice Header & G/L Entry tables: Firsly, create required fields ("Remarks") in below mentioned tables by creating table extensions: Purchase Header (38) Purch. Inv. Header (122) Gen. Journal Line (81)  G/L Entry (17) For the Purch. Inv. Header table, you can just create copy the field from purchase header and paste it in  Purch. Inv. Header  table. If the field ID No. is same for that field for both the tables then you don't have to code i.e, it automatically transfer that field data from Purch. Header to Purch. Inv. Header . Step-(1)   tableextension   50104  "Purchase Header Ext"  extends  "Purchase Header" {      fields     {         

Calculate Date : Using Date Formula and CalcDate Function in Navision/BC

 Hi Everyone, In this article we will see how we can Calculate Date by adding and subtracting No. of Days / Months based on CalcDate and DateFormula datatype. Here, I define three variables required for: (1) " No of Days " -  To define No. of Days / Months as required. You can also use these units denoted as: <Unit> = D | WD | W | M | Q | Y (D=day, WD=weekday, W=week, M=month, Q=quarter, Y=year). (2) " From Date " and " To Date "  Date type Variables to store calculated date in it. page   50103  "Date from Date Formula" {     PageType = Card;     ApplicationArea = All;     UsageCategory = Administration;     SourceTable =  Integer ;      layout     {          area( Content )         {              group( General )             {                  field( "No. of Days"; "No. of Days" )                 {                     ApplicationArea = All;                 }             }         }     }      actions     {          area